
A Whimsical Break: Sculpting a Plush Doll Face with Air-Dry Clay
I started making plush dolls over ten years ago, almost by accident. At the time, I needed a break from more serious, time-consuming doll projects - something lighthearted and pressure-free. What I didn’t expect is that these little plush characters would stay with me and eventually become an important part of my artistic practice.
Recently, I filmed a tutorial on one of the more advanced parts of doll-making: sculpting heads and faces for porcelain ball-jointed dolls. But today, I want to take you in the opposite direction. Instead of strict anatomy and precision, let’s sculpt something playful, simple, and delightfully imperfect. Think whimsy over realism - an opportunity to practice your sculpting techniques while letting your imagination wander.
In this post, I’ll walk you through my process of sculpting a small, expressive face for one of my plushies.
This post contains affiliate links, and I will be compensated if you make a purchase after clicking on my links. I wouldn’t promote anything I don’t absolutely love!
Materials I Used
Here’s a quick overview of the materials:
Air-dry clay: I use La Doll Premix, my go-to for sculpting small faces.
Tools: Metal sculpting tools, soft brushes for blending.
Base: Aluminum foil, which is lightweight, easy to shape, and perfect for flat-backed faces intended for plush dolls.
Polishing: Assortment of sanding paper.
Since this sculpt will be attached to a plush body, I’m giving it a flat back. If you're making a full head for another type of doll, feel free to create a rounded base instead.
Building the Base
I start by covering the entire aluminum foil base with air-dry clay without worrying about the character design just yet. At this stage, it’s all about building a smooth foundation. I use my fingers and sculpting tools to blend the clay, keeping a bit of water nearby to help it stick and prevent cracking.
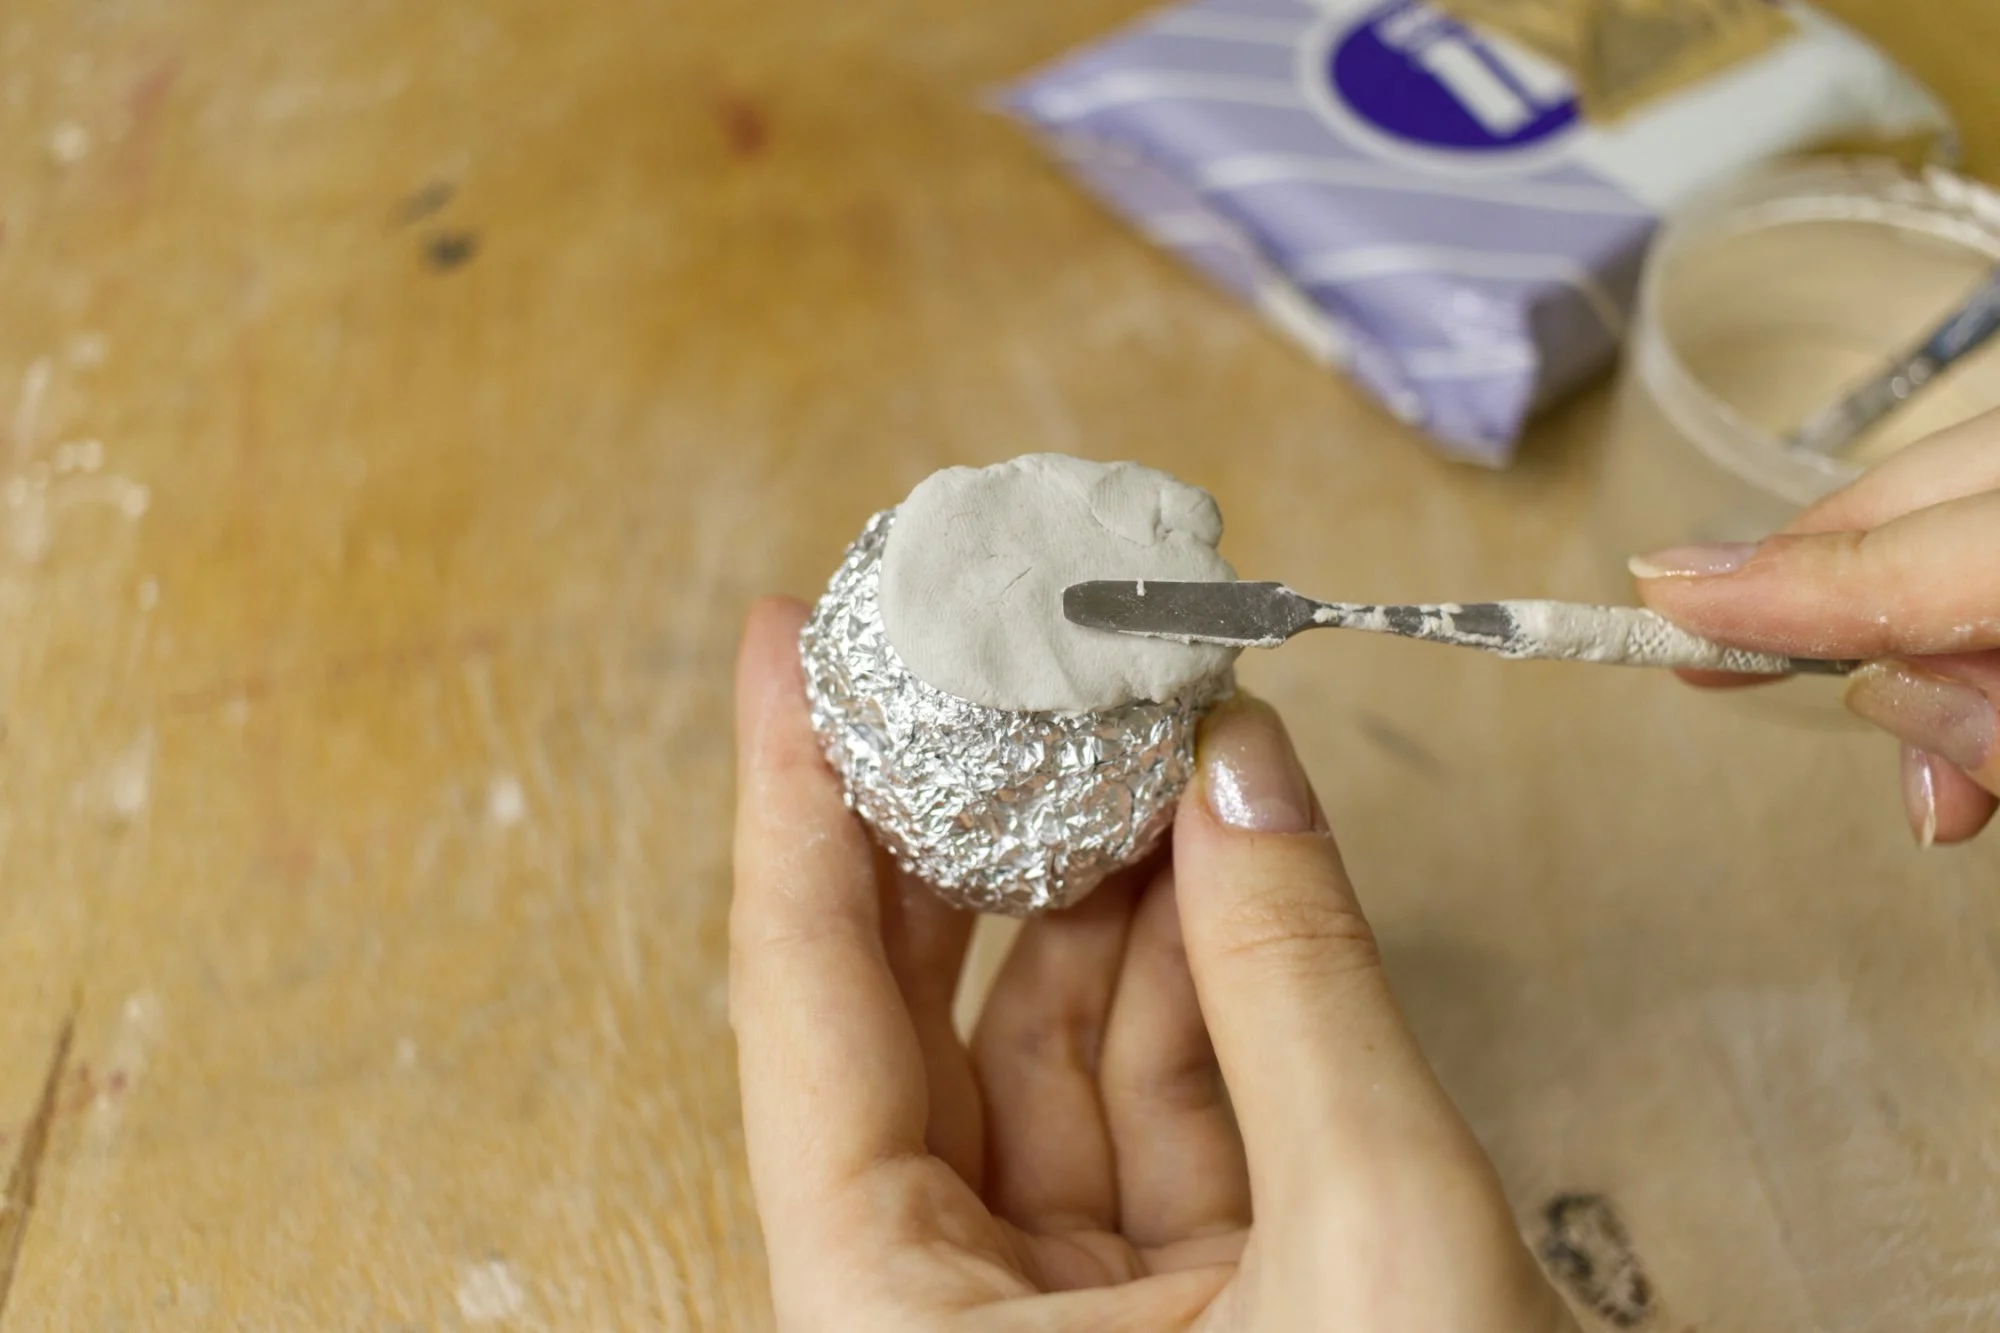

Water is especially important when layering clay - it helps all the parts bond securely and reduces the chance of separation as everything dries.
Once the clay is fully covering the base, I rough in some simple form by gently shaping the cheeks or chin so the face isn’t completely flat. These don’t have to be realistic - just a head start for sculpting the features.
After that, I let the base dry a bit before moving on. Working on a surface that’s slightly hardened makes carving and sketching much easier in the next steps.
Finding the Face
Sometimes I work from a sketch, but most of the time I start with a vague idea and discover the character as I sculpt. That’s honestly one of the most freeing and joyful parts of making these dolls - no pressure to be profound or perfect. I don’t worry about meaning or “importance.” I just create for the sake of it.

In many ways, these whimsical projects helped me unlearn some of the heaviness I picked up from art school - the idea that art has to be dark, exhausting, or painfully deep to matter. These little sculptures are my playful form of therapy, and I hope they can feel that way for you too.
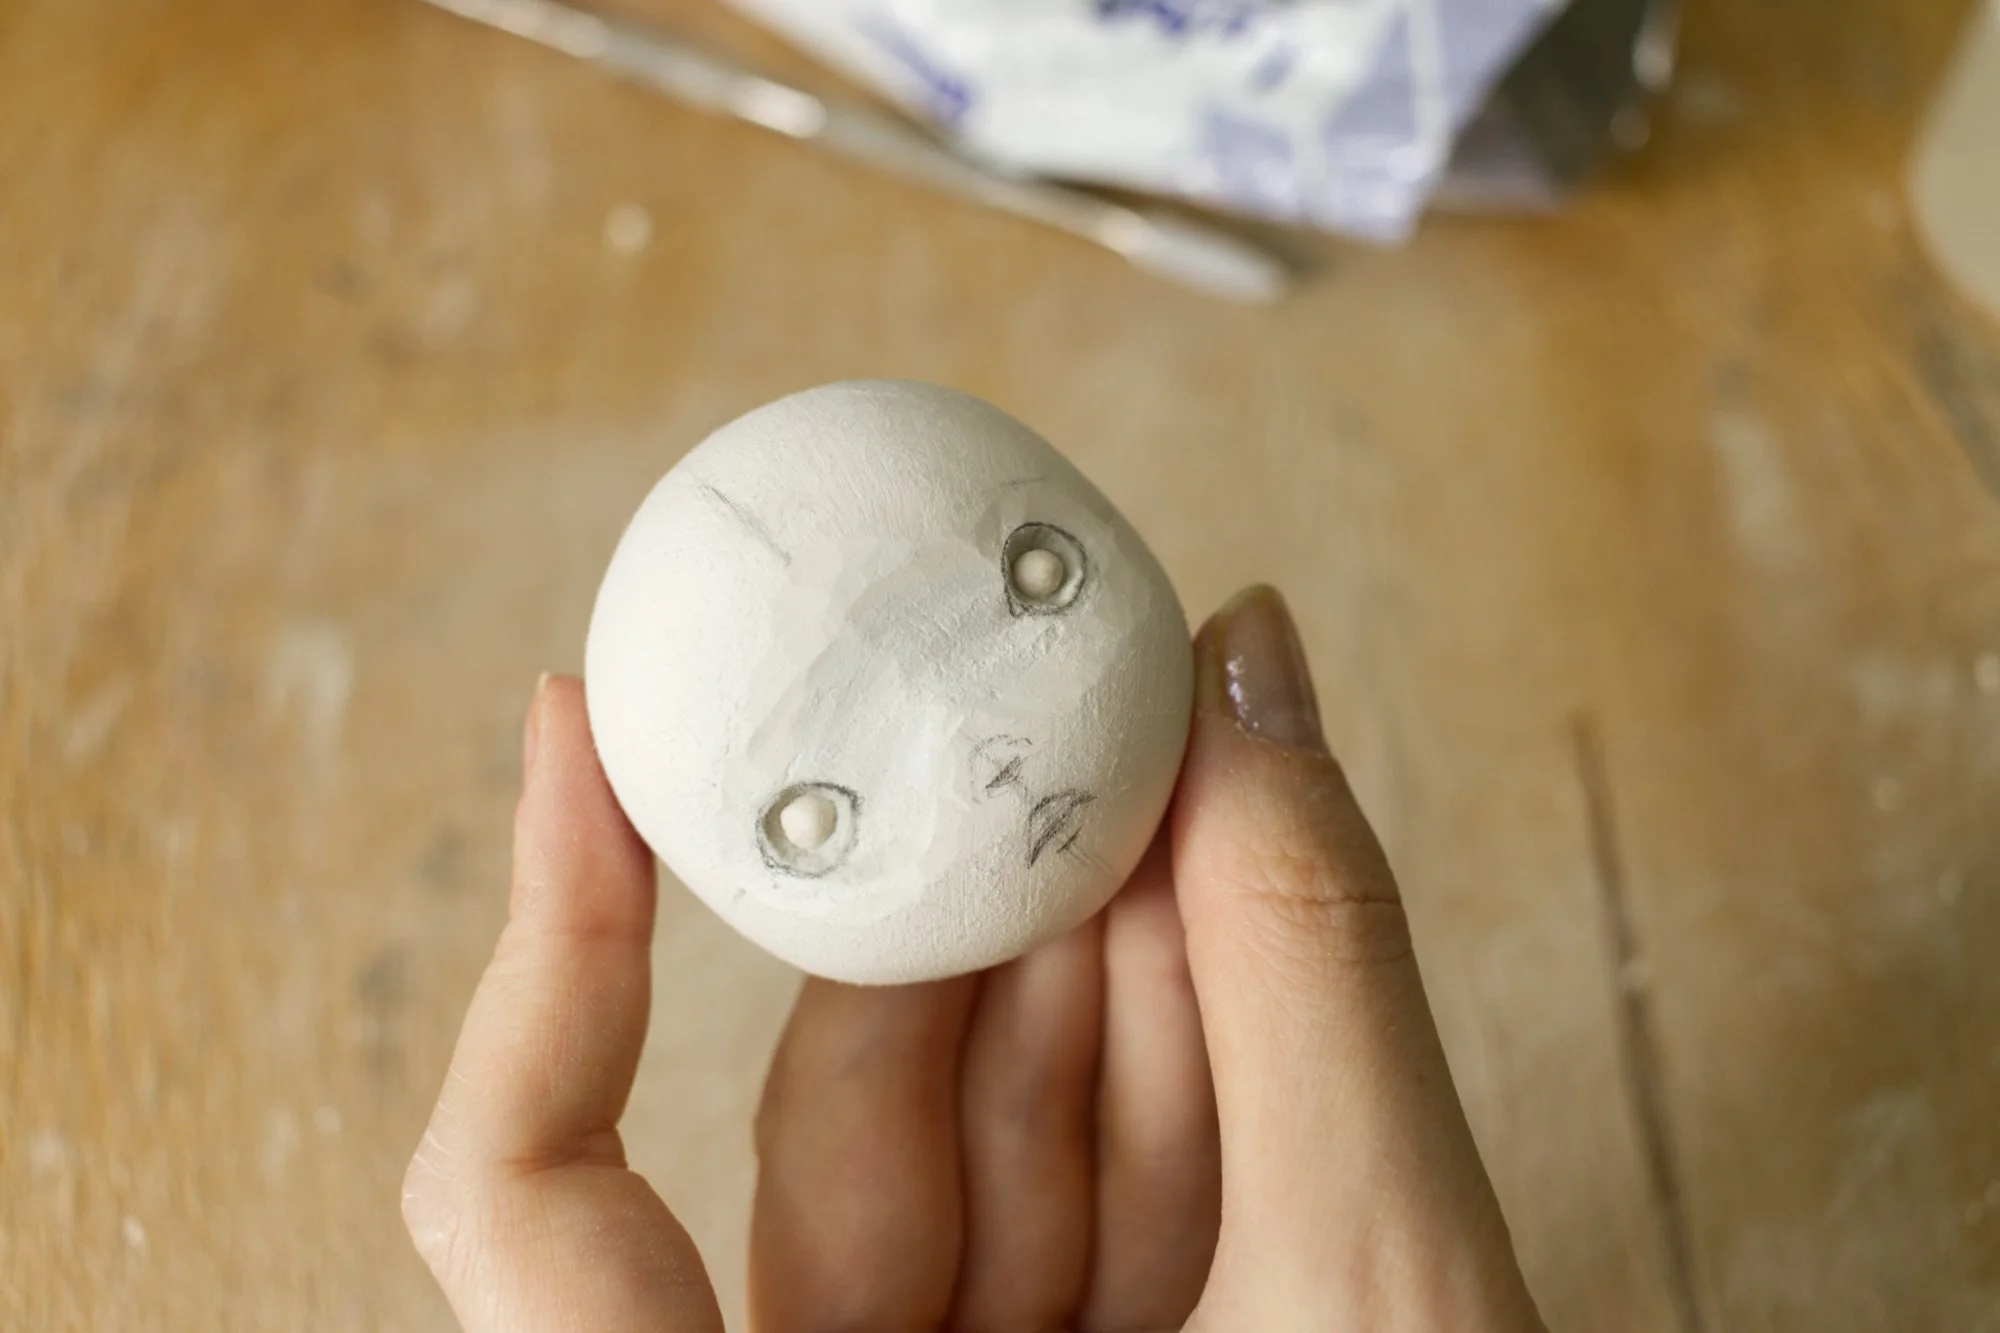
Once the base is firm to the touch, I sketch the placement of the eyes, nose, and mouth using a pencil. Don’t skip this part - pencil markings are a lifesaver when it comes to symmetry.
Sculpting the Eyes
I begin by carving shallow eye sockets. I prefer eyes that sit inside the head rather than resting on top. Air-dry clay is wonderful to carve, so don’t be afraid to shape and adjust as you go.
I also carve the space between the eyes to give the face more dimension.
Next, I moisten the eye area and place a tiny clay ball into each socket. You can add a little PVA glue if you want extra security, but it usually adheres well by smoothing the edges with a brush.

To form the eyelids, I add bits of clay above and below each eye and gently blend them in. I’m not trying to be precise yet - there’s time for refinement later.
One tip: if you're working on multiple pieces at once, you can sculpt, let the clay dry, and return later to sand or carve before adding more details. Layering and sanding as you go makes sculpting a lot easier.
Sculpting the Nose
I build the nose gradually, adding clay in small amounts and adjusting the shape as I decide what suits the character. While the clay is still soft, I use a tool to mark where the nostrils will go later.


Depending on the expression you're going for, you might make only a tiny button nose - or in this case, I’m adding a nose bridge as well. I wet the area, blend the new clay in, and keep everything smooth so the edges disappear.
Creating a Pouty Expression
At some point, I decide the doll should have a pouty, slightly grumpy but childlike expression - so big cheeks are essential! I add clay to the cheek and mouth area, building up volume before defining any features. The mouth area needs to protrude a bit to get that exaggerated pout.


When I reach this stage, I like to let the head dry fully again before continuing. Working on a harder surface allows for clean markings, carvings, and corrections. It also helps me check symmetry without accidentally smudging anything.
Refining Features and Adding Lips
With the clay dry, I draw guidelines for the lips. I start with the upper lip by placing clay in the center and blending outward, keeping the middle the most raised and round. Then I redraw my guide and build the lower lip separately to preserve the natural shape.

I also take this time to add subtle folds above the eyelids and define the nostrils further. Don’t forget the chin! It’s often overlooked, but adding clay here gives the face more character and balance. At this stage, my sculpture is usually covered in pencil marks - and that’s completely fine. Everything will be painted over later.
Sanding and Finishing
Before painting, I sand the entire sculpture with different grades of sandpaper. Use a very fine grit at the end to get a smooth, almost satin finish.

Once you’re happy with the surface, you can paint with acrylics, soft pastels, watercolors, or whatever medium you prefer.
A Gentle Reminder to Play
And that’s the end of today’s little sculpting break. I hope this inspires you to play, experiment, and create something just for the joy of it. Not everything has to be perfect or realistic - sometimes the most meaningful art comes from whimsy and curiosity.

If you’d like to see the full step-by-step tutorial for the plush ghost girl this face belongs to, you can find it on my Patreon. I share most of my in-depth videos there, along with behind-the-scenes content and other doll-making projects.
Thank you for sculpting with me today. Until next time - stay playful and keep creating.