Understanding proportions when sculpting dolls
Human body proportions is a hot topic in all visual art genres. Historically through all ages, artists and observers tried to canonise ideal standards on how human body should be portrayed. I don’t think we have to chase ideals as we all have different bodies and figures. Despite that, with all of our differences we still can fit in a few proportional rules that we’ll talk about today. In my opinion, you don’t have to create by these rules, especially when sculpting dolls, but it’s good to know them so your interpretation of human body wouldn’t be accidental but rather deliberate.

The head
Even when you’re not drawing or sculpting in a realistic manner, keeping the proportions accurate can give your creation integrity and natural feeling to it. One of the mostly used and basic unit of measurement is the head. For example, the average human is generally 7-and-a-half heads tall (including the head). Knowing that you can play with proportions: for a modelesque figure make your creation 9 heads tall adding additional height to the legs or 5 heads tall with a bigger head to achieve more childish and cute look.
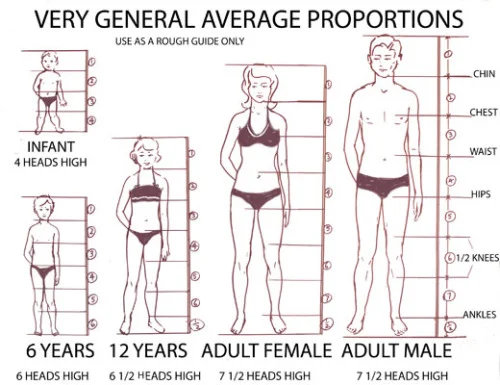
Photo taken from: artintegrity.wordpress.com
My dolls are usually 8-8½ heads tall. I’ve developed the style of a fragile melancholic creature with tall, slender body that really compliments the narrative. Sketching your characters can really help to understand the look you want to achieve.

Shoulders and hips
Generally hips are the widest part in a female body, shoulders are the widest part in male’s body – knowing this you can control masculinity and femininity in your sculptures. When creating a new doll think about what message you want to achieve with it. For example, if you want to portray a heroic strong woman figure you can manipulate proportions and sculpt wide shoulders and wide hips, this will make your character look more masculine and powerful.
Arms
When I first started sculpting, I remember that one of the hardest things to determine was where do the arms end and how long should they be. The answer is pretty simple - an average relaxed arm with extended fingers ends mid thigh and slightly higher if the fingers are bent.
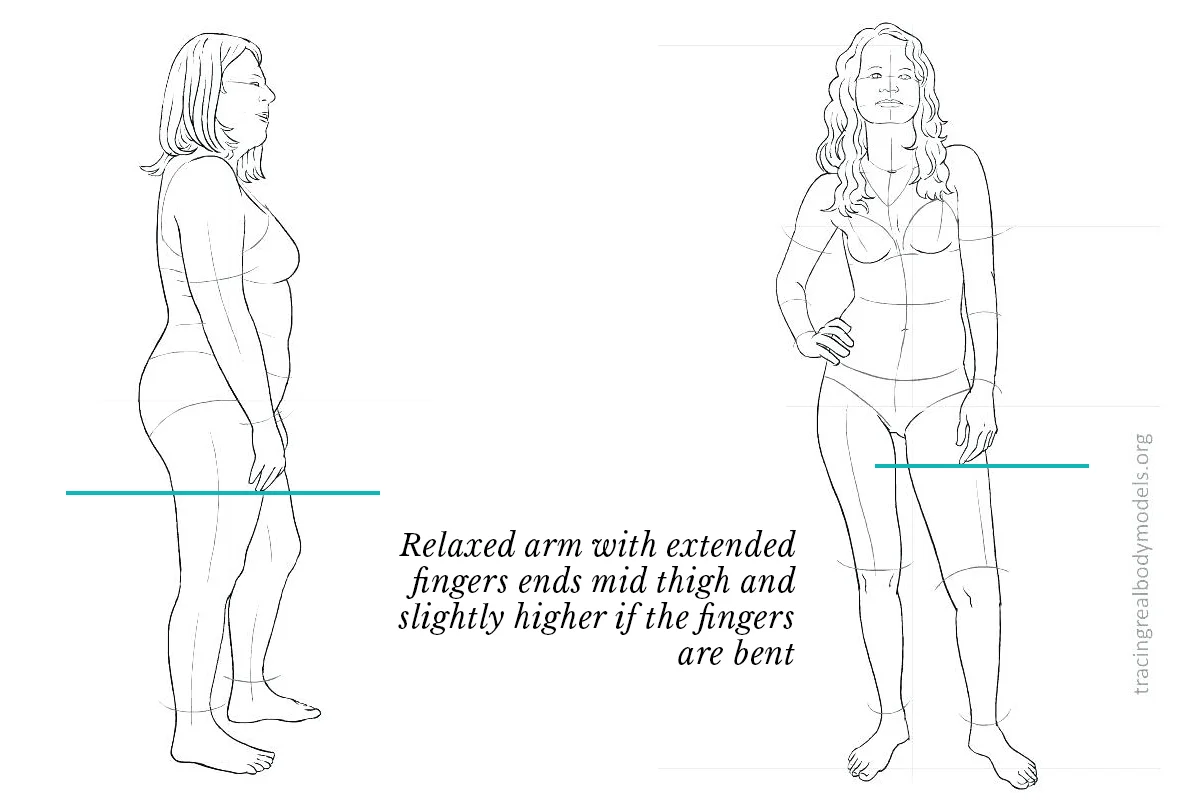
Photos from: tracingrealbodymodels.org
There are a few other tricks to determine the length of arms in the figure you’re sculpting. Going back to the measuring body using ‘heads’, the average arm is 3 and half heads long. I don’t use this very often but it might be useful when you feel that something just looks off. Another useful trick for determining where the elbow should be is very easy to remember! When the arm is relaxed the elbow and the naval (belly button) fall in the same line both in male and female bodies.
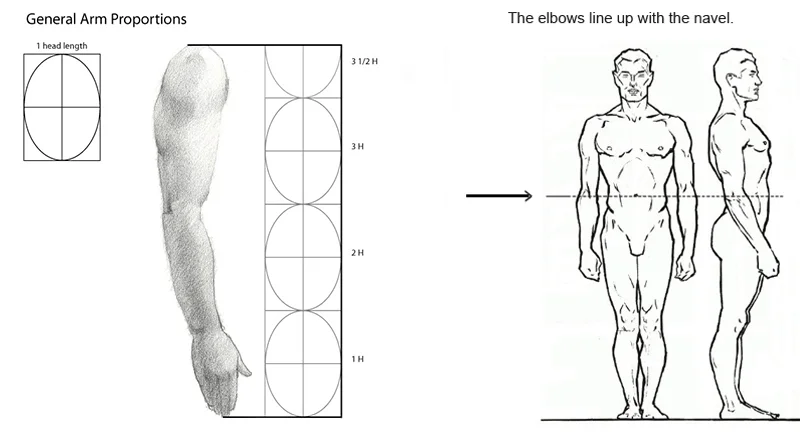
Pictures from: paintdrawpaint.com and thedrawingsource.com
Hands and feet
The feet are approximately the size of the whole head and the hands are the size of your face. Try it out with your hand! Place the palm amongst your face pressing the bottom part of the palm to the chin. Your fingertips should come up just a little bit higher than your eyebrows. When sculpting dolls I usually measure just the palm itself and sculpt the fingers longer than humans generally have. Prolonged fingers can appear more elegant or even otherworldly depending on how they’re sculpted.
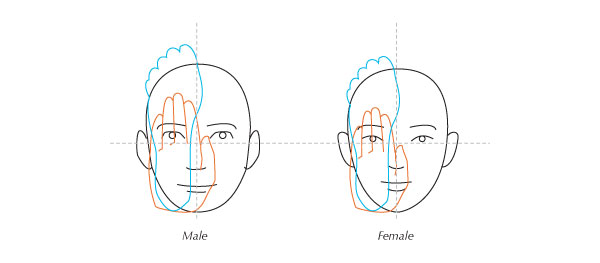
Photo from: design.tutsplus.com
Human Proportion Calculator
If you’re determined to sculpt dolls that portray real human proportions you can use this great tool that one of my students, Lori, just created!
Download the “Human Proportion Calculator”
Conclusions
These are the general proportions that you need to know before sculpting but you don’t have to follow. Knowing them can help you deliberately manipulate the human figure and create unique dolls that have your own signature look! Before sculpting create a drawing that will serve you as a blueprint. Have this drawing at your sculpting table and occasionally check your progress.
Personally I use these rules to calculate how much taller my doll will be than the average human, to determine the length of the arms, hands and feet. Everything else is left to make artistic choices that will fit my character. But knowing these rules I feel confident that I could sculpt an accurate human figure if I wanted to.
If you want to learn more about sculpting dolls and get some anatomy tips in the process, check out my doll making classes! Besides step-by-step tutorials, the classes include individual consultations via email or a friendly Facebook group created just for my students!