
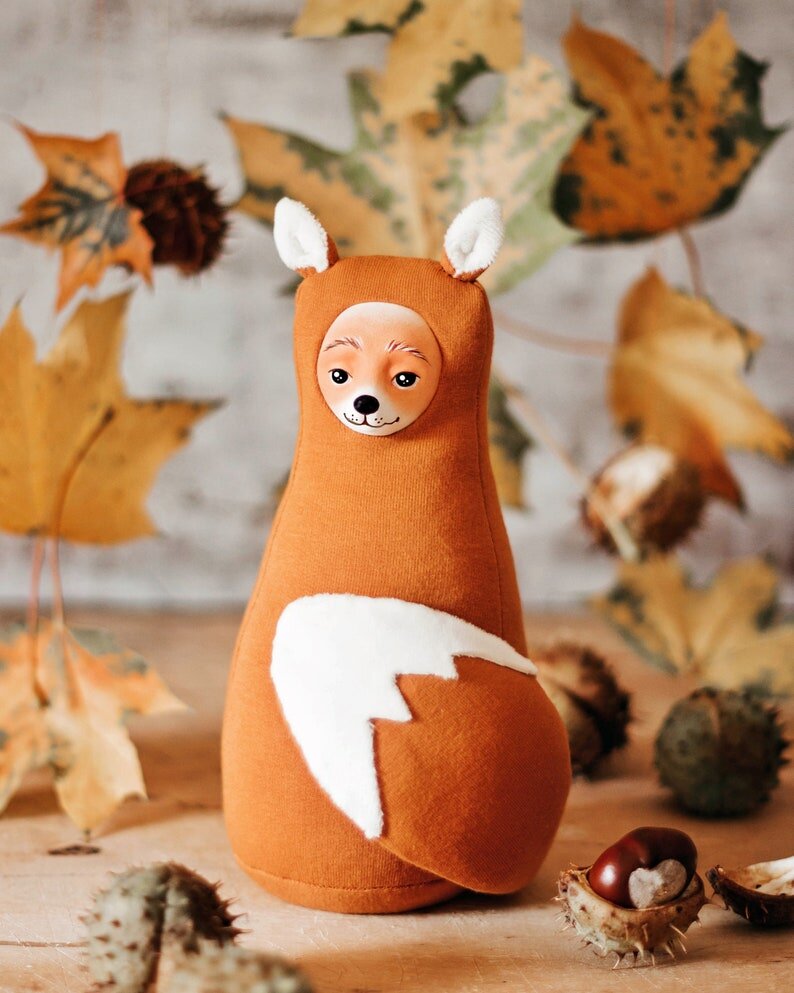
How I make plush dolls for my Etsy shop
As a doll artist, I love to dabble in different techniques and doll styles. You could say my range of dolls is quite eclectic, but I have some method to the madness, haha. My one-of-a-kind porcelain dolls can take months to create, so in between all that hard work, I like to sprinkle in some cute, easy to do plush dolls. They give me space to be silly, experimental and creative at the same time. So today, I’d like to show you how I make these plush dolls!

This post contains affiliate links and I will be compensated if you make a purchase after clicking on my links. I wouldn’t promote anything I don’t absolutely love!
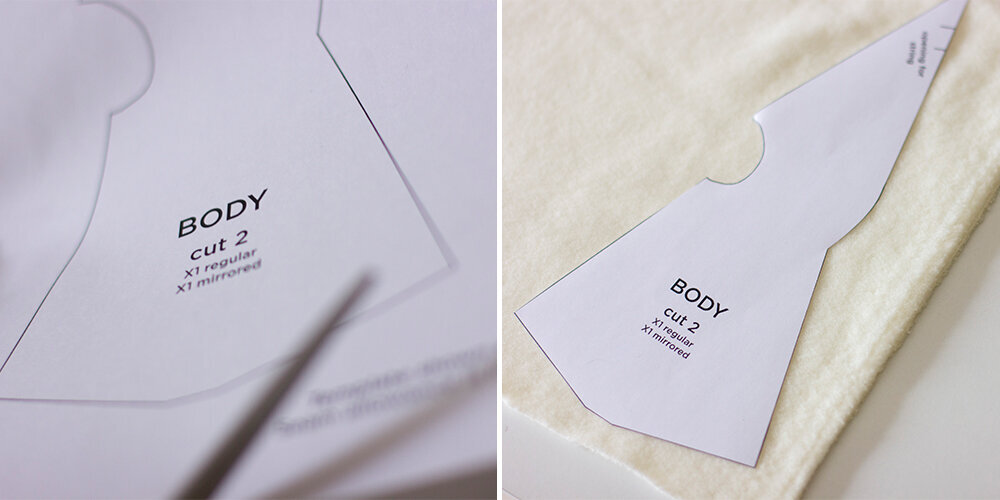
Designing a pattern
I design all of the patterns myself, usually starting with the rough sketch of how the creature will look. Then I start planning the pattern. It takes some spatial thinking to imagine how all the fabric pieces will come together into a doll. It helps to begin with paper and adjust the design until all the pieces fit. I like to sew one mock doll from cheap fabric to test the pattern. At this stage, I usually make some more adjustments.
Making a face
All my plush dolls have sculpted faces. For every new design, I sculpt a face and make a silicone mold of it. To create a face, I use air-dry clay, usually “La Doll” or “La Doll Premix”. Check out this step-by-step tutorial to see the full process.

How to sculpt sleeping faces
For me, sculpting the sleeping faces is always easier than the ones with open eyes, so I think this tutorial will be super friendly for beginners. Keep on reading and let’s sculpt some cute faces!
When the face is finished, I make a silicone mold. That's because I want to do replicas of the doll. Each doll in my Etsy shop can be repeated lots of times. They still are completely handmade by me. I just don’t sculpt the faces every time I get an order.


For painting the face, I use chalk pastels, watercolours and acrylic paints. Each layer of paint is sealed with water-based, non-toxic varnish. Read more about the painting process here.
Putting it all together
And now the fun part - putting it all together! Using a sewing machine, I make a doll’s body and fill it with polyester stuffing. All these plush dolls have an opening for glueing in the face, so stuffing one is very easy.

The next step is to attach the face. For that, I use a mixture of rubber glue and superglue. When the body is done, it’s time for additional details and decorations. That could be attaching the ears or legs, adding some ribbons, beads, etc.

Over the years, I streamlined the process of making plush dolls so well that now it only takes me 2-4 hours to complete one! They bring me so much joy each time I have to make a new doll. Today, in 2021, my Etsy shop is nearing 1000 sales, so you can imagine how many of these dolls I made, haha.

I hope this was an engaging insight into the process behind my plush dolls. Let me know in the comments if you’d like to make one! Also, don’t forget to subscribe to my newsletter, so you will be on top of all new articles and updates!