
How to sculpt sleeping faces + budget clay review
Over the last months, quite a few people asked me to make a sleeping face sculpting tutorial and I’m happy to oblige! This time I’m trying a new clay as well so you’ll find a review at the end of this tutorial. For me, sculpting the sleeping faces is always easier than the ones with the open eyes, so I think this tutorial will be super friendly for the beginners. Keep on reading and let’s sculpt some cute faces!

This post contains affiliate links and I will be compensated if you make a purchase after clicking on my links. I wouldn’t promote anything I don’t absolutely love!
MATERIALS:
Paper, tin foil or styrofoam - Usually I use fine grain styrofoam that florists use for flower arrangements for the base. But for this doll, I’ve used crumpled paper and masking tape for the base. You can also use a half of styrofoam ball or even tinfoil shaped into the form you need.
Modelling clay - I’d recommend using air-dry clays like “Creative Paperclay“ or “La Doll”. These clays are easy to work with, extremely lightweight, suitable for really detailed and delicate dolls, sands to almost shiny finish and are strong enough. In this tutorial, I’m testing Jovi air-dry clay only it’s a lot cheaper in Europe costing around 2.50 € ( about 3$).
Various tools for sculpting and cutting - you don’t necessarily need a lot of sculpting tools if you don’t want to invest, use what you have around the house: blunt knife, chopsticks, brushes, spatulas and your fingers! Also, you’ll need an X-Acto knife.
Sanding paper - to achieve that smooth finish you’ll need to sand your sculpture.
By the way, you can purchase these faces (painted or blank) in my Etsy shop! They come in sets - 5 faces per set. If you’ve just started learning how to sculpt and don't want to make the faces yourself, it’s a great workaround. Also, they come in handy if you want to practise painting!

These faces are available in my Etsy shop!
Making the base
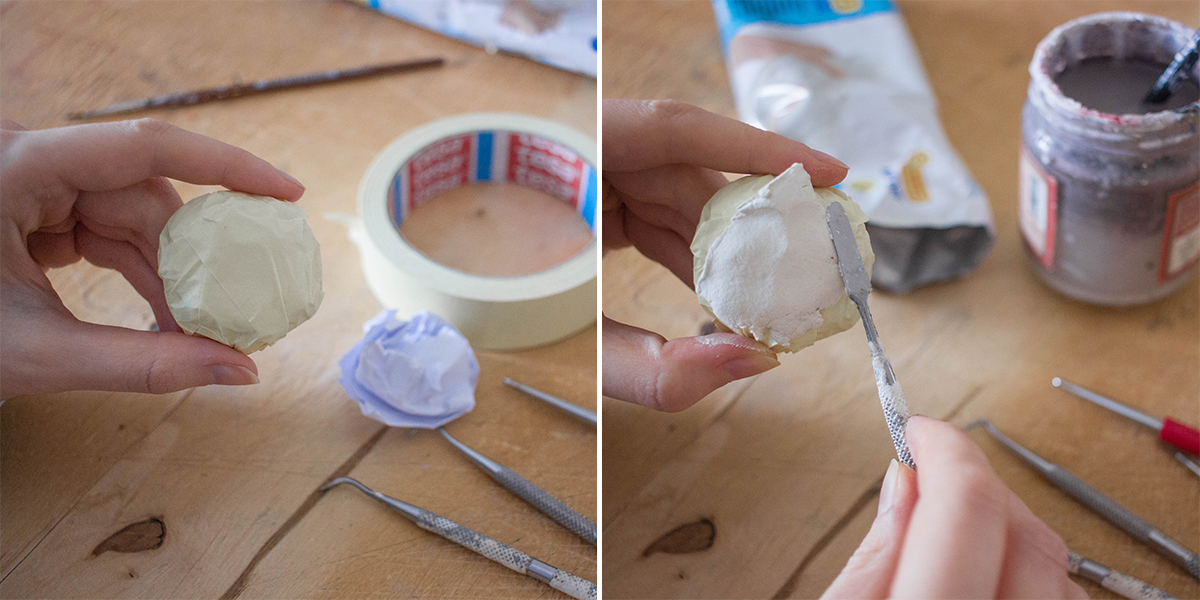
Usually, I use styrofoam for the base (you can see how in this tutorial), but I didn’t have any this time so a little bit of paper and masking tape did the trick! You can use tin foil as well, just cover it with masking tape so the clay would have a good surface to stick to.

Cover everything with clay and leave it to dry. Sand the surface with the sanding sponge to remove the larger bumps.

Roughly mark the centre line, the position of the eyes, nose an lips. This will be your guidelines in the sculpting process.
Sculpting the basic shape

I’m adding clay to the forehead area and around the eye sockets to make it more human-like, because the face is currently very flat and without any features.
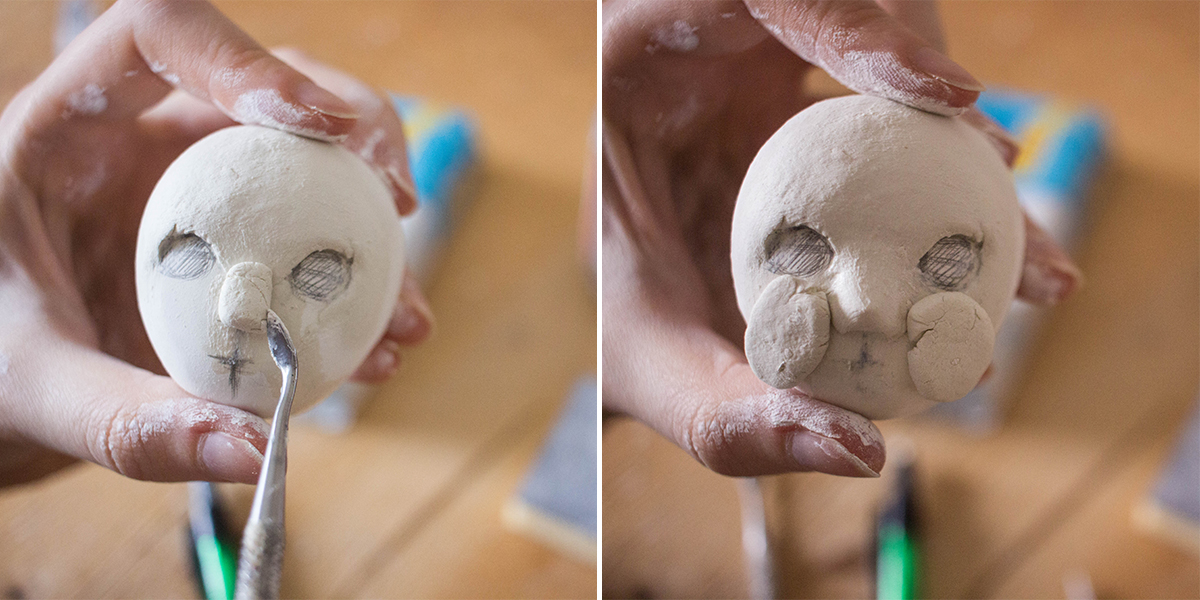
Continue adding clay while shaping the nose and cheeks. Don’t worry about detailing yet. It’s important to sculpt the basic silhouette first so you can alter the shapes easily. It becomes harder to correct any mistakes when you spend a lot of time detailing the features and encounter some basic issue you’ve missed in the beginning.
Sculpting the eyes
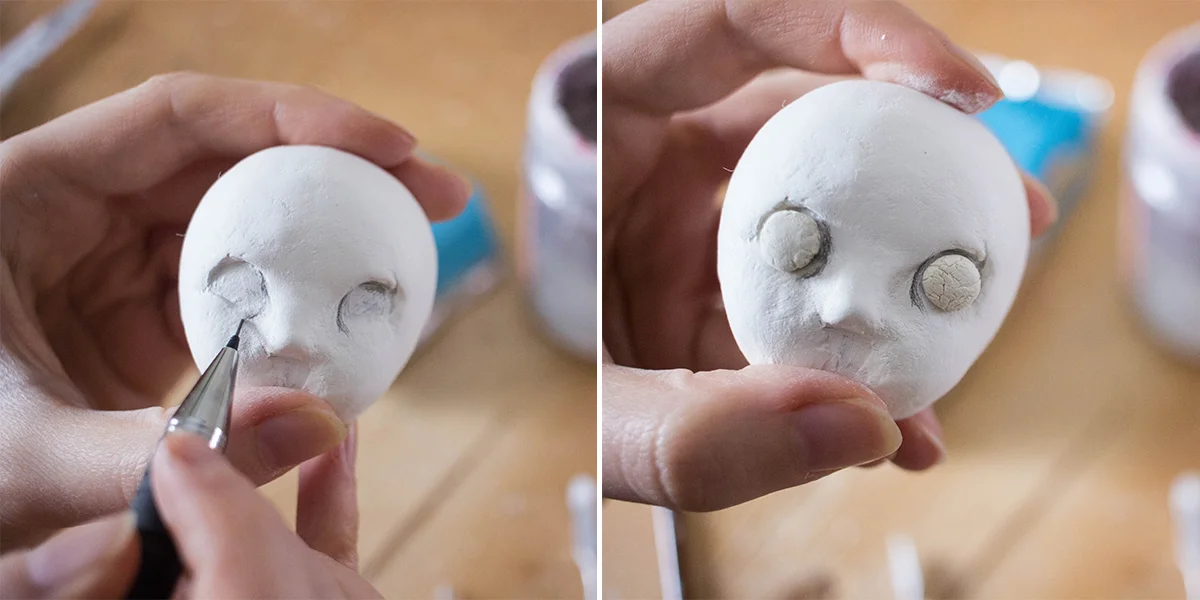
Mark the spot where the eyes will sit. Add two balls of clay to the marked places. Use water so the clay sticks better.
Smooth out the seams of the clay and mark where the eyelid edge will be while the clay is still wet. The shape can be a little bit curved like this ︶
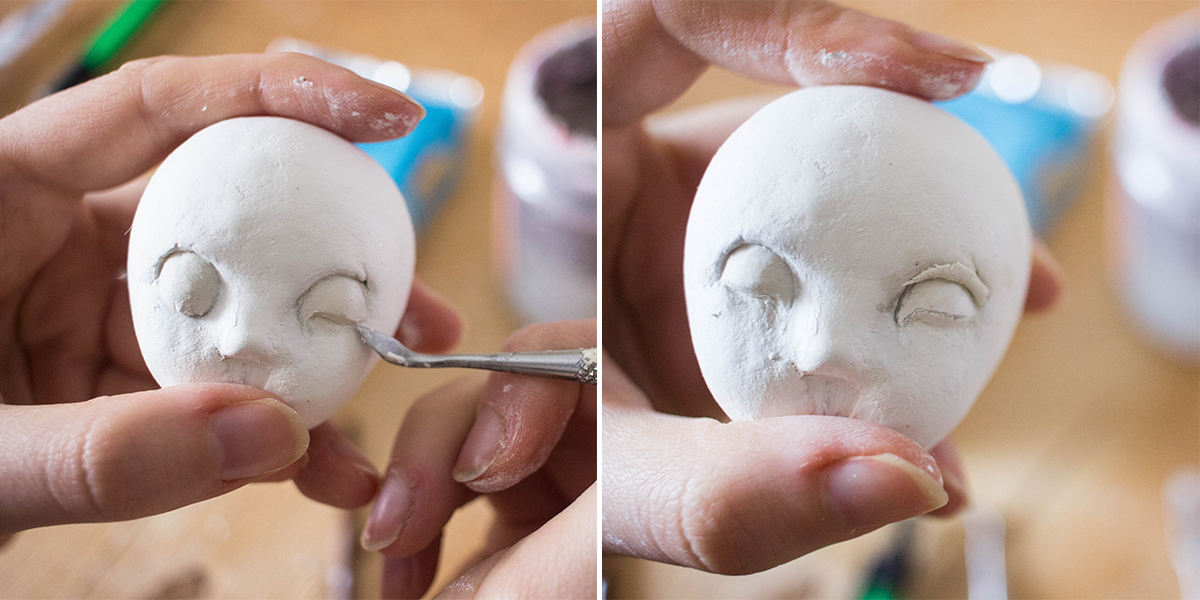
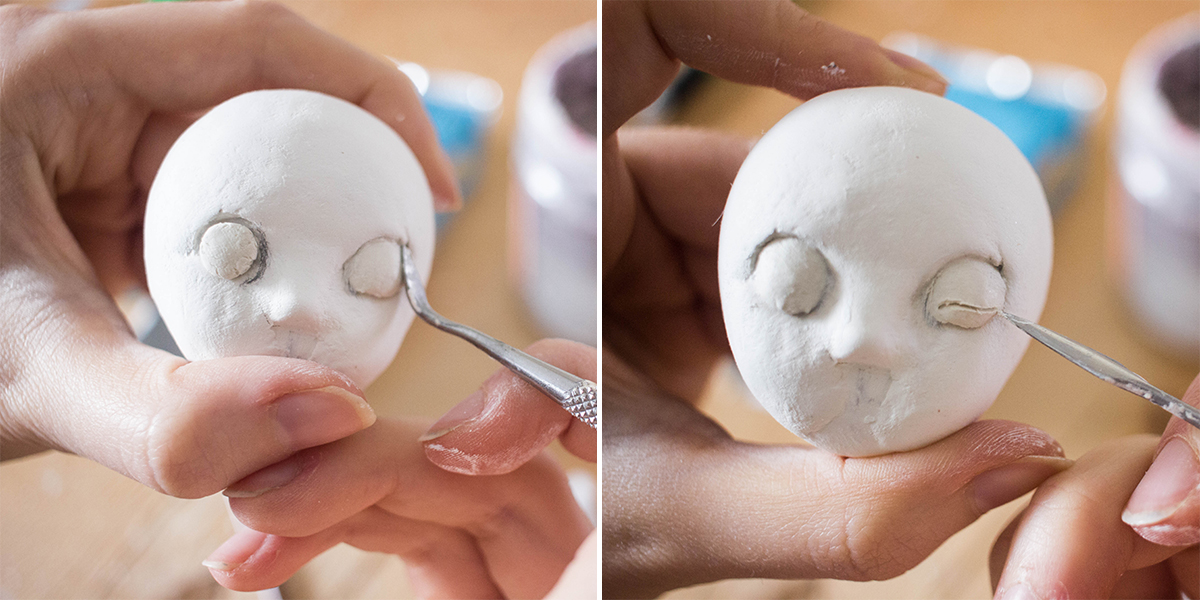
Remove the excess clay from the edge of the eyelid, keep the shape you’ve marked before. I’m adding a little bit of clay where the eyelid connects to the brow bone to soften the contour of the eye.
When the clay dries, lightly sand the eyes to see if the shape needs more refining. It’s completely optional, but I add a little bit of clay to sculpt the lower eyelid.
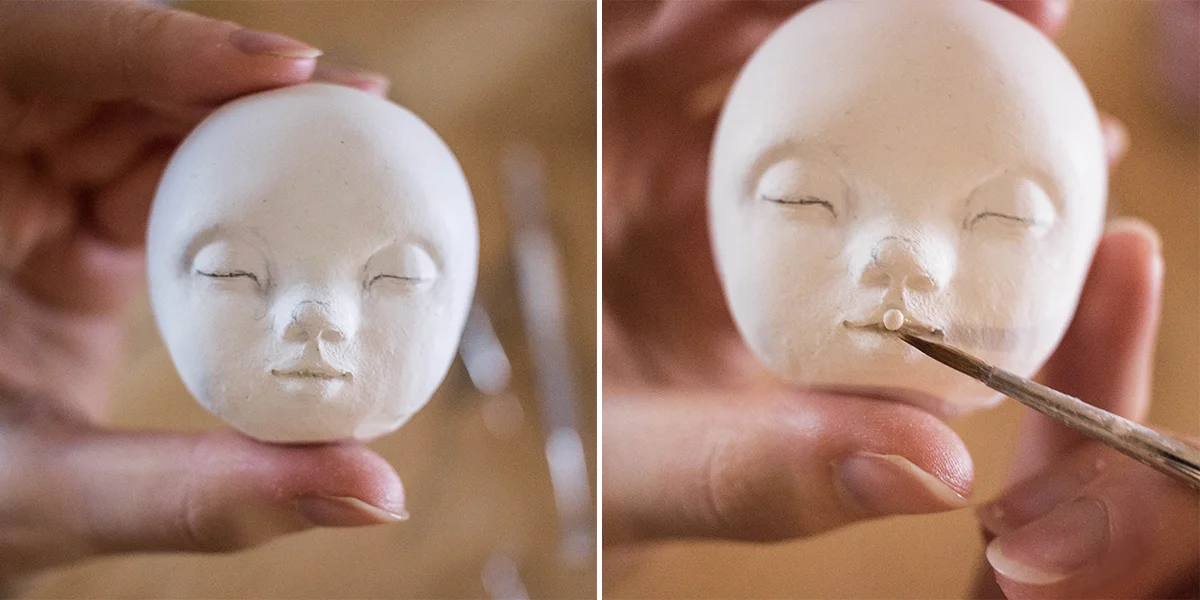
Sculpting the nose

Now I’m adding the clay just at the tip of the nose, because I’ve sculpted the bridge of the nose beforehand. Smooth out the clay to the shape you’re trying to achieve. With the round sculpting tool (it’s called dotting tool) form the nostrils. Leave it to dry completely before moving on to the next step. It’s very easy to mess up the nose when the clay is still soft!
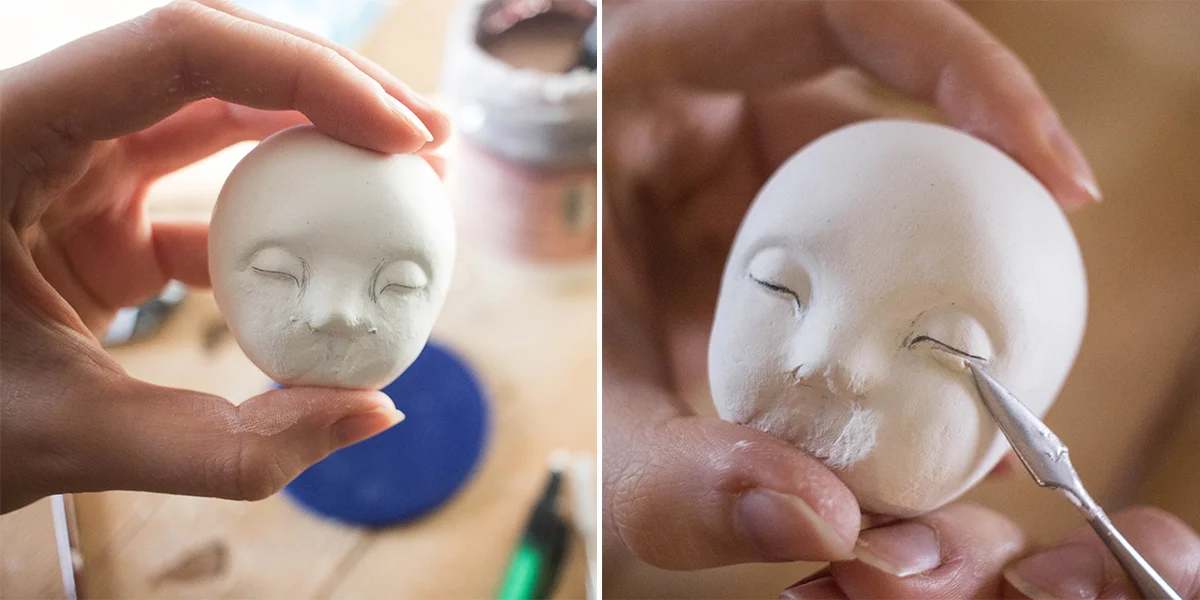
Sculpting the lips

Add a generous amount of clay to the lip area. The lips should be more protruding than the eyes. Smooth out the clay to soften the edges.

Emboss the cupid’s bow using the pointed tool or even the dotting tool. Mark where the corners of the lips will be while the clay is still soft.

Connect the corners of the lips in a slightly curved line and use the angled sculpting tool to separate the upper and the lower lip. This step can be a little bit tricky but keep forming the lips until you’re happy with the result. A lot of it can be improved by sanding and carving later when the clay is dry.
I keep altering the lips by carving the opening a little bit more. I also add some clay to the upper lip to make it more voluminous.

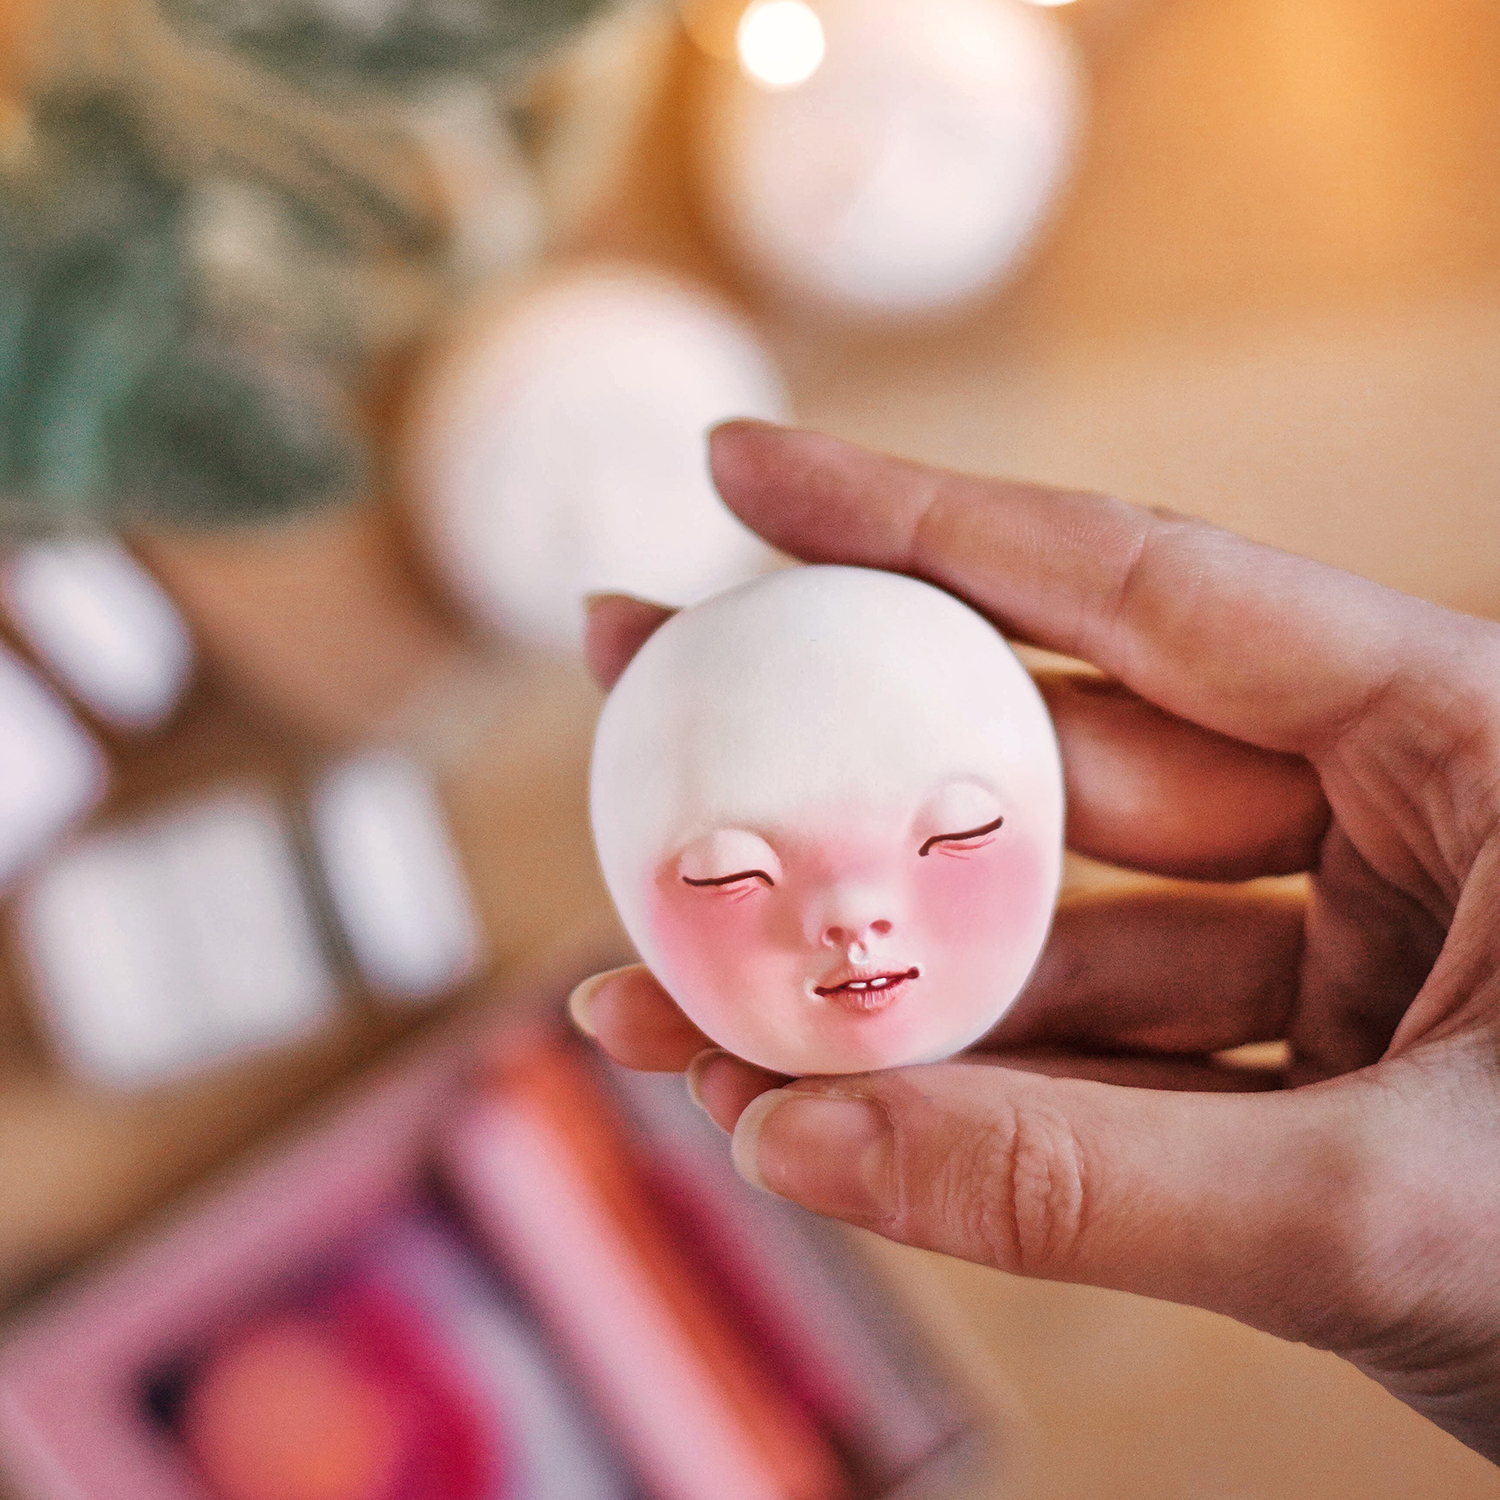
For the last step, sand the whole face lightly and see if it needs more detailing. I’ve decided to add two little teeth to make the face more whimsical. And then sand everything until it’s smooth and silky! For more tips on how to achieve the satin smooth finish see this article:

How to achieve the satin smooth finish with air-dry clay
Today I'm going to share a few steps that I take to give my dolls the satin smooth finish. It took me years of experimentation to find what works so I hope you'll find it helpful!
And here’s the result! I really like how the face turned out. It was very fun to paint it as well. The whimsical grin and sleepy eyes add so much character. Can’t wait to make some dolls with them!
Jovi air dry clay review
For this tutorial, I’ve decided to try out a new clay that I’ve never used before. It’s a budget clay – for comparison, 500 grams (1.1 lb) of Jovi clay costs me 2,5€ (about 3$) and 500 grams of "La Doll” clay costs 10€ (about 11,50$). Sadly this clay is this cheap only in Europe, or at least that’s what I found during my research.

I didn't expect to like this modelling clay because of the low price. But it actually wasn’t bad at all! It wasn’t as smooth and easy to spread as “Premier” clay but with a little bit of water, it’s very workable. Sculpting tiny details like teeth was the only thing that I found tricky. The clay wasn’t holding its shape on this tiny scale so the teeth kept disappearing when I tried to sculpt them. After a few tries, I gave up and sculpted them from “La Doll”. Other than that I very much enjoyed this clay. It won’t replace “La Doll” or “Premier” but I’ll keep using it for sculpting the base or the areas that don’t need a lot of detailing.
Let me know if you have any questions in the comments down below!